Thursday, 11 April 2013

Oatmeal Cream Pies

I had never had a Little Debbie Oatmeal Creme Pie until about a year ago.
My boyfriend bought a box and I have to say they were so addictive I think we ate the whole box in less then 24 hours. Thinking about that makes me feel ill. When you are in it though, and those cream pies are sitting on the table calling your name, it's hard to resist.
I decided I would make Oatmeal Cream Pies for him and they are all over the baking blog world.
I ended up using the recipe from sallysbakingaddiction because it was easy and I didn't need to use gelatin and I had the ingredients. I love oatmeal cookies so I knew that whatever happened they would be wonderful. Tt was just a question of how close they would be to the original Little Debbie Oatmeal Creme Pies and how much my boyfriend would like them.


Homemade Oatmeal Cream Pies

Cookies
1 & 1/4 cup margarine
1 cup brown sugar
1/2 cup sugar
1 egg
2 tsp vanilla
1 tbsp cooking molasses
1 & 1/2 cups AP flour
1 tsp baking soda
1/2 tsp salt
3/4 tsp cinnamon
1/4 tsp ground cloves
3 cups quick oats


Preheat oven to 375 degrees F.
cream together butter and sugars until smooth
add egg, vanilla, molasses and continue to blend together.
in another bowl add in all the dry ingredients and lightly mix.
slowly add the dry ingredients into the other ingredients and continue to mix. You may have to end up mixing with a wooden spoon as the mixture will be thick.
scoop out round amounts about 2-3 tbsp in size and place on cookie sheets. (I made some larger ones and some smaller only 1 tbsp in size)
the cookies will spread out so leave enough room between each cookie.
bake for about 10 minutes until cookies are golden on the edges.
allow to cool on the cookie sheets for a couple minutes then allow to cool completely on wire racks.


Once cookies are completely cool make the cream filling:
3/4 cup margarine
3 cups powdered sugar
3 tbsp whipping cream
1 & 1/2 tsp vanilla
pinch of salt

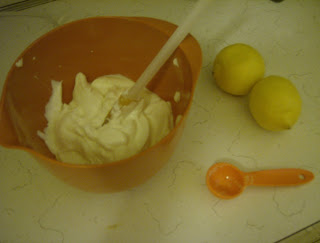
beat butter until creamy. add the sugar and mix together. pour in the cream and vanilla and beat until fluffy. add a pinch of salt or more if desired. Add more sugar or cream depending on how thick or thin you would like the filling to be. Spread filling on bottom of one cookie and sandwich with another.

These cookies were really good. I enjoyed them alot and so did my boyfriend.
However, hey are not like Little Debbie's, I'm not sure if it would even be possible to mimic the texture and flavour of those little plastic wrapped creme pies. bravetart says her recipe is the closest to them, so I'm going to have to try them out sometime!
I still have Cream Filling let over though, I wonder what I should put that filling on or in...hmm..


Tuesday, 9 April 2013

for love of peanut butter!

I LOVE PEANUT BUTTER! I. Love. It!
have I ever told you that? I really do.
If you asked my boyfriend he would tell you I feel this strong love for other things as well, he probably has a list so he can make fun of me about it, but it's true I really love peanut butter.

A while ago I wanted to make my own peanut butter because how hard could it be all you really need is peanuts. I looked at different websites to see if you had to put oil in too or not and just peoples different take of making it. I came across Averie Cooks because she makes her own peanut butter and in lots of variations. She also has a cookbook focused on all peanut butter snacks. I made my own peanut butter and it's delicious and I plan to make my own variations which for some reason I had never thought of until looking at what Averie had made.

This week I wanted to make something fast and easy. However, I wanted it to be super good obviously. I don't remember why I decided on Peanut butter and Jam. Probably because I LOVE PEANUT BUTTER! There are so many great recipes out there but I decided to go with one from Averie Cooks because she seems to be the peanut butter connoisseur.

I'd like to tell you now that if you love peanut butter as much as I do, and if you love peanut butter and jam. If you love grilled peanut butter and jam sandwiches (which were introduced to me by my sister-in-law as she use to make them for herself when she was vegan and couldn't have grilled cheese). If you love ooey, gooey desserts with a sweet and salty combination. This recipe is not for you. It really, really is not for you. I'll tell you why... because you will eat the whole tray. You will eat the dough, you will eat the topping. and you will eat it as soon as it comes out of the oven and burn your mouth on it. So I'm telling you now. Just stay away.

These are to die for.


Peanut butter and Jam Blondies
recipe from averie cooks

1/2 cup butter melted
1/4 cup peanut butter melted
1 cup brown sugar
1 egg
2 tsps vanilla
1 1/4 cup AP flour
1/4 tsp salt
1/4 - 1/3 cup peanut butter in tbsps
1/4 - 1/3 cup jam/jelly in tbsps


Preheat the oven to 350 degrees. Line a square baking pan with foil.
heat the butter until melted then add in the peanut butter. stir until all melted and smooth. you may need to heat the mixture again to melt the peanut butter completely.
add the sugar, stir in to mixture.
add in the egg and vanilla, stir to incorporate.
add the salt and flour. Mix until combined. Do not over mix.
pour the batter into the prepared pan.
(i used a electric mixture however it was not necessary)


Now scoop tbsp size amounts of peanut butter and jam onto the batter.
then swirl together.


now you are ready to put your creation in the oven. Bake for 20-25 minutes.
you are not going to want to over bake these so keep and eye on them.
You want them to be an ooegy, gooey mess. trust me.
let them cool before taking the out of the pan and slicing so the peanut butter has time to set.
I do not recommend eating them right out of the pan as you will burn your mouth.
but boy was it worth it.
voila.


Tuesday, 2 April 2013

Lemon Cheesecake

Since I'm a grown up now and live on my own, when I attend family gatherings I have to contribute to the feast. I guess "have to" might be too strong. I like to contribute. Being in love with baking naturally I wanted to bring dessert. I decided on making a strawberry milk cheesecake featured on sprinklebakes. However once I fell in love with this cake, and obtained all the ingredients except one, which was strawberry milk powder I hit a little bit of a problem. Canada does not have strawberry milk powder, or at least not where I live. I went to a number of stores and my mother being the great women she is helped me look as well with no success. I even looked on ebay! The dilemma was then what should I make instead? Cheesecake naturally because I had the ingredients, but what kind? Lemon and Strawberries was all I could think about, both remind me of spring flavours and it just so happened that strawberries were on sale this week, bonus! I then had to decided what lemon cheesecake recipe to use. After I looked at so many recipes, and had to avoid all recipes that contain gelatin as my brother and his fiance are vegetarians I decided on one from creative-culinary. It seemed easy enough, which is what I needed as I had never made a cheesecake before. I did however look at multiple other sites to tell me how to know when it was done. To be honest right until I cut into this cake I was still unsure of whether or not I cooked it enough, or too much or how this cheesecake turned out. It seemed alright but having no cheese
cake experience except for eating it I had nothing to go on except what I read, my faith in my trusty old gas oven, and my baking spirits. And I must say the cheesecake gods must have been looking down on me because this was lemon bliss.


Lemon Cheesecake
recipe from creative-culinary

Crust:
2 1/4 cups graham cracker crumbs
1/4 cup granulated sugar
6 tbsp melted butter

preheat oven to 350 degrees F.
mix together crumbs, sugar and butter. once combined press into a large spring form pan. on the bottom and sides. (I used a 10 inch, the original recipe calls for 11-12 inch.)  
bake crust for 5 minutes and allow to cool.

Filling:
3 - 8 oz packages of cream cheese, softened
3 eggs
1 1/3 cup granulated sugar
3 tbsp lemon juice (fresh squeezed prefered)
2 tsp vanilla extract
1 tsp lemon zest

beat cream cheese until smooth.
add in eggs one at a time, beat until smooth each time.
add the sugar, vanilla and lemon juice. beat until smooth and combined.
stir in lemon zest.
pour into cooled crust.
baked in heated 350 degree F oven for about 45 mins. (since I used a smaller pan I had to bake it longer original recipe says bake time 35 mins.) 


Sour Cream Topping:
2 cups sour cream
3 tbsp granulated sugar

mix sour cream and sugar together.
once baked remove from oven.
spread sour cream topping on cheese cake and return to oven.
bake for another 15 mins. 

remove from oven and allow to cool on rack for 30 minutes.
place in refrigerator and allow to cool.
prepare lemon glaze.

Lemon Glaze:
1/2 cup granulated sugar
1 tbsp plus 1 tsp cornstarch
1/2 cup water 
2 tbsp lemon juice

in sauce pan combine sugar and cornstarch.
place on medium heat and stir in water and lemon juice.
bring to boil, stir constantly and until mixture is thickened.
take off heat and allow to cool.
once cool pour onto cheese cake and refrigerator cake overnight.

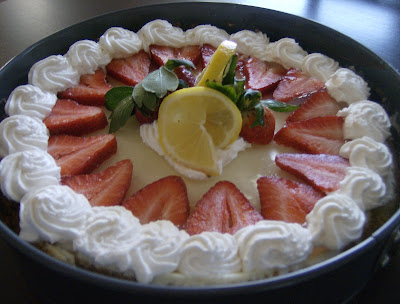
Top with whipped cream and strawberries, or whatever you've like.


Saturday, 30 March 2013

Bagel Bites

I'm a bargain shopper. I love deals which I get from my Dad. When I was a child we would go shopping at Safeway on Saturdays and he would give me coupons and I would run around trying to find the items. He trained me at a young age to be frugal and so here I am today. There was cream cheese marked down at the grocery store by my house and I thought that would be perfect to use in bagel bites from the-baker-chick. Not making the cream cheese would simplify the whole process, and I was able to whip them up in the morning before meeting up with my parents to assist with Easter Dinner.

Bagel Bites:
adapted from thebakerchick

filling:
one container light cream cheese ( I used vegetable)


dough:
3 1/2 cups flour
1 tsp salt
1 1/8 tsp active dry yeast
1 3/4 cups water
1 tbsp vegetable oil (I forgot to put oil in.)


scoop out 16 balls of cream cheese on to a pan and place in freezer.
In a bowl combine flour, salt and yeast.
pour in water and oil and mix until a shaggy dough is formed.
on a floured surface knead dough for about 8 minutes. You may need to add more flour to form it to the texture that is needed. when done kneading the dough should be smooth, slightly sticky and come back when poked.
place in a bowl and cover. let rise for 45 mins.


preheat oven to 325 degrees F.
once risen remove from bowl onto a lightly floured surface.
cut the dough into 16 pieces.
form each piece into a round disk about 3 inchs in diameter.
place frozen ball of cream cheese in center of each dough disk.
bring sides of dough around cream cheese and pinch. roll dough in your hands to form a nice smooth bun shape and place on a parchment lined pan.
now you can brush with butter or egg and sprinkle with your desired toppings.
-my dough was sticky, probably stickier then it should have been so I just took each ball and dipped it in a small amount of chili pepper flakes and they stuck just fine.
bake the bagel bites for 20-30 mins. until golden and cream cheese starts to burst out.
once they are done, you can allow them to cool slightly and try to tuck the cream cheese back in or just leave as is.


I think my dough ended up being too sticky, and I think I may have not formed the dough even enough around the cream cheese thus allowing them to explode prematurely. Even though they aren't super pretty, they still taste pretty damn great. Being a person who doesn't eat bagels or cream cheese all that often I found these to be just perfect for me.


Thursday, 28 March 2013

Pretzel Bird Nest

I am really excited about spring and easter and mini eggs so I had to make another recipe with that theme in mind.

I made Bird Nests inspired by bakeat350 but ended up changing many things about them. I did not like the idea of using ramen noodles, it didn't appeal to me at all. I also wanted to make it a little more spring tasting so I added in white chocolate chips and candied peel, which I have leftover from making hot cross buns. I'm really impressed with how these turned out the candied peels really put it over the top for me and they are just so darn cute.


Pretzel Bird Nests
inspired by bakeat350
1/8 cup margarine
2 cups mini marshmallows
1/2 cup white chocolate chips
3 cups broken pretzels
1/4 cup diced candied peels
1/3 cup dark chocolate chips
cadbury mini eggs


line a cookie sheet with parchment paper.
in a sauce pan melt butter at medium heat.
pour in the marshmallows and occasionally stir.
once marshmallows have melted pour in the chocolate chips and stir in.
pour in the pretzels and candied peels into the marshmallow mixture stir until completely coats.
take off heat. and cover your hands in butter or oil. you may need to do this repeatedly through out the shaping process.
take handfuls of mixture and form into a ball. place on parchment paper and press thumb in to form a nest.
while the nests are setting melt dark chocolate chips.
in the set nests spoon chocolate to line the inner nest and place mini eggs in the chocolate.
place in the refrigerator to allow the nests and chocolate to complete set.


Carrot Banana Cupcakes with Nests

With Easter coming up and Spring in there air it's hard to resist all the flavours and lovely colours that it brings. I became a little head over heels for a cupcake from howsweeteats. With pastel chocolate eggs and some of my favourite flavours in particular carrot cake how could I pass it up.

I decided to change the recipe slightly and in doing so got a little bit a head of myself. In the end they did turn out well and very moist. I would suggest to refer back to the original recipe before attempting to make these though. As mine is not as fool proof as hers probably is.

What I changed was: I made half of the recipe, I used apple sauce instead of coconut oil and I used brown sugar because I love brown sugar and how it makes baking more moist/chewy and gives a bit of richer taste. In this case I needed to add more flour in to make up for using brown sugar, and I need to cook it twice as long. In the end I probably should have done some more adjusting, but that's just how it goes.


Spring Carrots Banana Cupcakes:
adapted from howsweeteats
1 cup AP flour
1/4 cup whole wheat flour
1 tsp baking soda
pinch of salt
1/2 tsp cinnamon
1/4 cup unsweetened apple sauce
1 cup brown sugar
2 eggs
2 bananas mashed
1 cup grated carrots
1 tsp vanilla
1/4 + 2 tbsp buttermilk (I used almond milk with 1/2 tsp of white wine vinegar)


Preheat oven to 350 degrees, put in paper liners to your muffin tin and put aside. 
In a small bowl combine the dry ingredients
In a large bowl whisk sugar and eggs until combined. Once combined add in the apple sauce, carrots, vanilla and bananas. Mix these ingredients together.
Alternately add the flour and buttermilk to the carrot mixture. Stir until well combined and batter is smooth.
Once batter is ready, fill each cup 3/4 of the way full. 
Bake for 35 minutes or until centers return when poked or tooth pick comes out clean.
Set aside and cool completely.


Coconut Cream Cheese Icing:
1/2 cup cold cream cheese
1 cup icing sugar
1 tsp vanilla
1/4 cup toasted coconut + more for sprinkling
Cadbury mini eggs


In a medium bowl blend cream cheese until smooth.
Add in the icing sugar, vanilla and coconut and blend until smooth and combined.
If you like the icing thicker or thinner adjust to your preference. (icing sugar thicker, milk thinner)
Either pipe the icing on or use a spatula to spread the icing on the tops of the cupcakes.
Once iced roll the edges in toasted coconut and place mini eggs in the center.


Monday, 25 March 2013

Easter Bread and Buns

With Easter coming up I have been getting the baking itch even more then usual.
In particular I wanted to tackle the Traditional Ukrainian Bread - Paska, and making Hot Cross Buns.
I remember having Paska at easter as a kid but our family hasn't had it in years, and I only learnt what a hot cross bun was when I was a teenager and I worked in a bakery and made them there.
At the Bakery I made Paska and Hot Cross buns but I had never tackled them on my own.

My Mom also told me that my Dad remembers having Hot Cross Buns as a kid that his Grandmother would make but hadn't had one since. That being said that made me even more excited to get underway with my easter breads.

On Sunday I spent the day with my Mom and it being Palm Sunday meaning only a week until Easter it was a good time to tackle my easter bread. I made the Paska and My Mom assisted me with the Hot Cross Buns. We also made dinner together for the family. It was a great day, good quality time with flour flying, and Mom's company.


I started with the Paska, I used a recipe from thekitchenmagpie. It seemed really simple that is why I chose this one after searching through a few others online. It was going to make too much Paska for what I needed so I cut the recipe in half.

Paska/Babka (thekitchenmagpie)

1 tbsp active dry yeast
1/2 cup margarine
1 cup milk
1/2 cup water
1/4 cup + 2 tbsp sugar
2 tsp salt
3 egg yolks
1 cup raisins
1/4 tsp tumeric
4-5 cups of flour


Heat up your milk, sugar and butter in a sauce pan or in the microwave.
Once heated and butter is melted pour in the water and let cool. Do not cool completely but should be warm to the touch. Once cooled, pour in your yeast and stir around a little. Let it sit for a few minutes so the yeast can activate.
In a bowl beat your eggs and tumeric. 
Once the yeast has activated pour the mixture in with the eggs.
Pour in half of your flour and mix until combined with a wooden spoon. 
Add in the raisins.
Now you can either continue trying to mix in the remaining flour or remove dough from bowl onto a floured surface. 
Knead the dough and continue adding the rest of the flour until it is only slightly sticky.
When dough is done being kneaded it will be only slightly sticky, smooth and spring back when poked.
Put the Paska dough in a bowl to rise. You can either cover it and leave it in a warm place.
or something new my Mom and I tried was making a proofer in the oven!


How you make your oven a proofer is: (littlehouseinthesuburbs)
Boil water and put it in a pan on the bottom rack. Put the dough in a bowl on the rack above.
Turn your oven to 400 degrees F for exactly 1 minute. Then turn it off. Do not open the oven door.
Let the dough sit in the oven for the appropriate amount of time, in our case for about an hour or until doubled in size. 

Once the dough has risen separate it into the how many loaves you are going to make.
I made on in a can and one in a 6" spring form pan.
The can needs to be greased really well for it to be able to come out in the end. I used pam on both the pan and the can.
Fill each only half way as the dough is going to rise a lot.
I put them back in the oven for proofing for about 30 minutes or until the tops have risen out of the pans.
Preheat your oven to 325 degrees F.
(If proofing in the oven remember to take out your loaves before preheating the oven.)


While my Paska was rising I prepared the dough for my Hot Cross Buns which I will discuss a little further down. You can see it tucked in behind the Paska.

Brush the tops of your Paska with an egg wash before putting in the oven.
Bake fore 30-40 minutes on the bottom rack. The tops will get very dark but that is suppose to happen.
Let them cool slightly and then remove and let cool completely on wire racks.


Hot Cross Buns:
from Anna Olson

3/4 cup milk
4 tsp instant dry yeast
1/3 cup sugar
3 large eggs
1/2 cup vegetable oil
3 3/4 cup flour
1 tsp lemon zest
3/4 tsp salt
1/2 tsp ground cinnamon
1/4 tsp nutmeg
1/4 ground cloves
1/3 cup raisins
1/4 mixed diced peel

Warm the milk to until warm to the touch. 
Pour in all the ingredients in to a bowl except for the raisins and peel.
Mix with a wooden spoon until combined and dough started to form.
On a lightly floured surface place the dough and knead for about 5 minutes until smooth.
Add your raisins and peels and knead the dough for another few minutes.
Place your dough in a bowl and cover. let rise for 75-90 minutes or until doubled in size.

Once the dough has doubled remove the dough from its bowl onto a floured surface. 
Form the dough into twelve buns. (Using both hands continue rounding and tucking until smooth.)
Place the buns on a 9 X 13" pan with space for them to rise. Cover and let rise for 45 minutes.
Preheat your oven to 350 degreed F.
Bake the buns for 25-30 minutes until brown on top.
While the buns are cooking prepare your glaze.

Glaze:
1/2 cup sugar,
3 tbsp water 
1 tsp vanilla.
-Heat in sauce pan until sugar is dissolved.

Remove the buns from oven and cover with glaze while still on the pan.
Let the glaze set then remove the buns to a wire rack to cool completely.
Prepare Icing (3/4 cup icing sugar, 1 tbsp milk) and pipe crosses on to eat bun.


I'm really pleased with how everything turned out. My Grandma came over for dinner that evening and could not believe I made the Hot Cross Buns. She kept telling my Mom that she was lying. My Grandma loves baking too, and so does my Mom so I guess it in our genes.


Mint White Chocolate Rice Krispie Bark

I still have Christmas Rice Krispies left over and I've been wanting to use them.
I didn't want to make plain old Rice Krispies Squares when the possibilities are so endless.
However, with possibilities being so endless it took me a long time to decide.

Finally I looked for Cookies and Cups for inspiration again.
I really liked the idea of making a sort of Bark with the Rice Krispies. C&C

I thought I would make my own mixture and hopefully it would turn out.

How could anyone go wrong with Rice Krispies, Marshmallows and chocolate right?


Well i'll tell you how! Even though it did turn out and taste good and overwhelmingly sweet I didn't end up making what I had planned. This was because I did not put the appropriate amount of butter in my pot to stop the marshmallows from sticking to the pot, and I walked away from them for a moment and when I came back they were getting toasted and became a big mess so I had to act quickly. With having to act quickly I had to change up what I was going to do. Oh well lessoned learnt.

Mint White Chocolate Rice Krisipie Bark:

3 tbsp margarine
2 cups (& a few for the top) mini marshmallows
2 cups rice krispies
1/2 cup coloured mint chips
3/4 cup white mint chips
1/4 dried cranberries
1/2 cup dark chocolate chips
confetti sprinkles


In a pot melt margarine
pour marshmallows into the pot with the melted butter, stir occasionally.
when marshmallows are melted pour in the rice krispies and stir up.
add in the coloured mint chips and mix in with rice krisipies.
on a baking sheet (or other flat surface) roll out the rice krispes to 1/4 inch thickness.
Melt white mint chips and spread over the top of the rice krispies.
Sprinkle with dried cranberries and marshmallows.
Melt dark chocolate and drizzle over everything.
scatter sprinkles over to your liking.
Once all the steps are completed put the "bark" in the fridge to cool before cutting.


I found this to be super sweet, as you might imagine, but if you are in the mood for something with lots of different textures and flavours as well was teeth achingly sweet try it out. OR better yet mix some of your favourite flavours together and make your own.


Tuesday, 19 March 2013

Pumpkin, it's never to late.

I wasn't into my mad baking phase when it was pumpkin season so I feel as though I am a little left out. There are so many pumpkin recipes that look really great so it's always in the back of my mind.

When I went to a grocery store that was closing and found pumpkin pie filling on for a ridiculously crazy low amount I was delighted and thought how great it was and what I could make. Little did I realize that what I really needed was pumpkin puree.

Once I realized this I looked for a recipe that would accommodate my pumpkin pie filling and found one that looked delightful on Baker Royale
Once changing the recipe slightly and adding my own cinnamon cream cheese glaze I found that they turned out beautifully.

Pumpkin Pie Cookies
as adapted from baker royale

1/2 cup unsweetened apple sauce
1 large egg
1/2 cup granulated sugar
1/2 cup brown sugar, packed
1 tablespoon molasses
3/4 cup pumpkin pie filling
3/4 tsp of cinnamon
1/2 tsp nutmeg
1/2 tsp ground ginger
1/4 tsp allspice
1 tsp baking soda
2 cups flour

I like to use unsweetened apple sauce instead of melted butter or oil in recipes. Anything I have made so far doing this has turned out fine. I think it might make the final product a little more cake like (spongey), but as I have not made those recipes with butter/oil I can't tell you for sure. I think it's all tastes good, and is a healthier option.


Preheat oven to 350 degrees F.

Combine the apple sauce, egg and sugar in a bowl and mix together. 
Add in the pumpkin pie filling, molasses and spices. Mix it all up.
Add in the baking soda and mix a little longer until all combined.
Add flour into the bowl and mix with a kitchen spoon/spatula. (Use that elbow grease.)
Once all combined drop rounded spoonfuls on to baking sheets.
You may want to line the sheets with parchment or a little bit of oil first.
Bake for 10 minutes or until the bottoms are brown and darker then the top.
Let them cool on the pan for a minute or two then remove to wire racks.


at this point I though "what can I do to make these guys a little more interesting?"


And so I decided to make a little bit of icing/glaze to go on some of them.

Cinnamon Cream Cheese Glaze/Icing: 
(I made this up and have forgotten exactly what I did so this is what I think I did)
1/4 cup cream cheese
1/4 icing sugar
1 tbsp milk
1/2 cap of vanilla
1/2 tsp cinnamon.

Mix all those up and add a little more icing sugar if you want it to be thicker.
spread on the cookies and then top them by sprinkling a little more cinnamon to cover them.


I really enjoyed these.
They were super soft and the perfect amount of sweetness.

Monday, 18 March 2013

Bread and Buns


I bought milk the other day and planned to do some baking with it. I usually drink almond milk and figured I should use real milk in some of my baking. Other then making a milkshake and proceeding to spill it not once but twice (the second time all over the floor with hilarious results) that was all the milk I had used and it was now at it's best before date. So, what's a girl to do? Studying for a quiz in horrible advanced financial accounting? or bake? no contest. I ended up making a quick-buttermilk bread and fresh hamburger buns for the portobello mushroom burgers I planned to have on Saturday.

I have made this quick-buttermilk bread before. I made it with real buttermilk that time, and with dill and onions. It was delicious. This time I went a for something a little more exciting. I made it with hot pickled peppers and cheddar and habanero Kraft shredded cheese!

Quick-Buttermilk Bread
as adapted from thekitchn

2 cups AP flour
2 tbsp sugar
1 1/2 tsp baking powder
1/2 tsp baking soda
1 tsp salt
1 cup buttermilk
1 large egg
1/4 cup olive oil
1/4 cup chopped up hot banana peppers
1 cup shredded cheddar/habanero Kraft shredded cheese.


Preheat the oven to 350 degrees F. Grease a cooking loaf pan 9x5.
Whisk together the dry ingredients. In a separate bowl whisk together the buttermilk, egg and olive oil.
Dump the wet ingredients to the dry and mix them together. A soft, saggy dough should form. Fold in your cheese and peppers. Be careful not to over mix.
Pour the batter into the prepared pan and push into corners. Bake for 45-50 minutes. Once taken from the oven let cool in pan for 15 minutes before removing.

*I did not use real buttermilk. I made my own by putting a tbsp of lemon juice in a bowl and pouring the milk into the bowl, stirring it a little and then letting it sit for 2-3 minutes until it started to curdle.


The second delicious thing I made was Hamburger Buns. I really enjoy making bread and buns, I do not have a mixer or a bread machine so I do all the mixing and kneading by hand and I just love it! Making buns and bread takes quite a bit of time from all the mixing, kneading, and especially all the waiting for the dough to rise, twice. But if you have time it is totally worth it. If you are having a baking kind of day why not make some bread and while your waiting make some cookies to pass the time!

Hamburger Buns
as adapted from thekitchn

1 tbsp active dry yeast
1/2 cup warm water
1/2 cup milk
1 large egg
2 tbsp olive oil
2 tbsp sugar (I used a little less)
1/2 tsp salt
2 cups AP flour
1 cup whole wheat flour
1 tbsp margarine


In a large bowl pour in the yeast and then pour the warm water over it. Stir it a little then wait for the yeast to dissolve.
In another bowl whisk together the milk, egg, oil, sugar and salt.
Add the whisked ingredients to the yeast. 
Add in the flour and mix until it forms a soft dough.
Place the dough on a lightly floured surface and knead for about 10 minutes. The dough with start to become smooth, very slightly sticky and just start to look really pretty. 
Once the dough has been kneaded place back in the bowl and cover it. Let it rest for about an hour in a warm spot. The dough should double in size.

Once the dough has risen remove from bowl and place on a lightly floured surface. 
Cut the dough into 8 pieces and form each piece into a tight ball. I use both hands and go around in a circle continuing to tuck everything in until the dough is taught. 
Then place the round little guys on to a baking sheet and push them down a little in place.
Cover the buns in and let them rise for about 40 minutes. They should double in size again.

Preheat the over to 375 degrees F.

Melt the butter/margarine in a bowl and brush over the buns. This will give them a softer top when baked.
Bake in the oven for 15-18 minutes until golden and delicious.
Let them cool a little while before attempting to slice them. 


After the buns were made, and I returned home from work it was time for me to make portobello mushroom burgers and have a nice dinner with my boyfriend. We both decided that our hamburger was  pretty good. The patty however was really tasteless, but the bun really sold it.

 Stick to what you know I suppose. 

Thursday, 14 March 2013

It's Brownie Time.

I have been craving something ooey gooey chocolaty delicious. But it couldn't be just anything.
I searched through countless baking blogs for tips on what to do, ingredients to add in or recipes to combine. I was about to go with a classic mixture of some of my favourite flavours peanut butter and chocolate.

But then, my Dad in formed me that he got transfered at work and a celebration was in order. It shifted from my wants to "what can I make that Dad loves?" He is a lover of ooey gooey things as well. I don't know how much he loves the whole peanut butter chocolate combination though. So after looking through baking blogs again I found myself stuck going back and forth through cookiesandcups. I love her recipes, I have ever since I first stumbled upon her recipe for chocolate chip cookies with a peanut butter cup smooshed in the middle. So after looking through all her recipes and finding inspiration I just jumped in and concocted a little brownie mixture of my own.

The recipe I ended up making is based off of C&C brownie rolls brownie recipe. I intend to make roll ups very soon so I thought I'd just test out the brownie recipe while I did this one.

A Mess of a Brownie

1/2 cup semi sweet chocolate chips
1/2 cup butterscotch chips
1/4 cup of butter/margarine
1/2 cup brown sugar
1/4 cup granulated sugar
2 eggs
a cap full of vanilla
1/2 flour
1 mars bar, extra chocolate chips and butterscotch chips.


preheat oven to 325, line a 9x9 baking pan with aluminum foil
melt butter, chocolate and butterscotch chips over the stove.
once melted remove from heat and whisk in sugars, then eggs one at a time, then add vanilla.
once well combined, stir in the flour. once smooth pour 1/2-3/4 of batter into the pan. cut up the mars bar into pieces (whatever size you prefer) and lay them in the batter, sprinkle in extra chocolate chips and butterscotch chips. pour the rest of the batter over top. making the top smooth. bake in the oven for about 35 minutes. Let cool completely before slicing...


I couldn't wait, I had to dig in. Just testing it out Dad!

You could go a little more crazy and put some frosting on and I just might.

Tuesday, 12 March 2013

Sugar cookies

The other day my boyfriend was talking to a friend of ours and she was saying how much she wanted sugar cookies. My boyfriend replied "well talk to devan and place your order." She didn't ask because others might think that is presumptuous. However, I do not. All I want to do is bake and I need people to give my baking too. So I contacted our friend and asked her what she wanted. She was delighted that I would make her cookies and she didn't care what theme or colours her sugar cookies were. I had to get creative and think of something. I asked my boyfriend what theme would be good, I suggested organ because our friend recently had her appendix removed. My boyfriend insisted X-files themed cookies were the way to go.

and so, OFF I WENT!

I used the sugar cookie recipe from "The Good Housekeeping Illustrated Cookbook" it's from the 1980's and my mom got it for me at a flee market. It is full of cooking and baking tips. It's a little out dated but I love it. I used the royal icing recipe from Joy of Baking.

Sugar cookies:
3 1/4 cups AP flour
1 1/2 cups sugar
2/3 cup shortening 
2 eggs
2 1/2 tsp baking powder
2 tbsp milk
1 tsp vanilla extract
1/2 teaspoon salt 

-In a large bowl mix all the ingredients together stopping to scrap the bowl occasionally.
-once it is all well mixed together, form it into a ball and wrap it in wax paper.
-place it in your fridge for 2-3 hours until it is a good consistency to work with.
-preheat your oven to 400 and lightly grease your cookie sheets
-take out half of the cookie dough and leave the rest in the fridge
-roll out the dough to the thickness you like. thiner = crispier, thicker = softer.
-use whatever cutters you like, or a knife to make your own designs. place cookies on cookie sheets.
-once you have done all the dough you can either brush the cookies with cream and put on toppings, or you can leave them like I did and bake them as is. bake for 8 minutes.


For my cookies I used margarine instead of shortening, and I did not put salt in. My dough was also a little too dry so I put two drops of half/half cream, I happened to have out, on my fingers while I was working the dough into the ball and it made it a perfect consistency for me. I baked the first batch for 8 minutes and they were a little to brown on the edges, and the second batch I baked for 7. I have a really old gas oven so it's very finicky. Just watch your cookies and when they look yummy to you take them out. If you cook them longer they will become harder.

Once the cookies are out of the oven let them cool completely on a wire rack.
When they are cool you can decorate them.

Royal Icing:
2 egg whites
2 tsp lemon juice
3 cups of confectioners sugar.
and whatever colouring you want the icing to be!

then have fun and be creative!


and after making the X-files cookies I had to design a few for myself of course.